ShakerBot+ Setup Guide
Everything you need to get ShakerBot+ configured and running — WiFi connection, schedule setup, and optional Bluetooth pairing.
Video: Configure ShakerBot+ on WiFi
Watch the full WiFi configuration walkthrough — the whole process takes about 2 minutes.
Power Up
Plug ShakerBot+ into any USB-C port on your computer, laptop dock, USB charger, or power bank. If your device has USB-A ports only, use the optional USB-A adapter included with the case bundle.
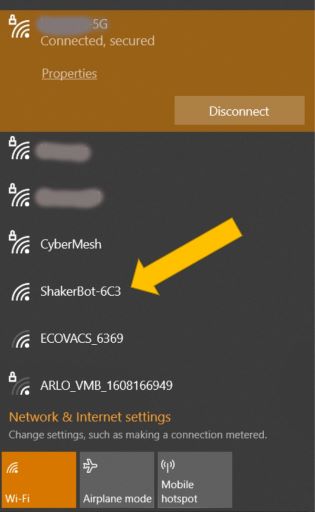
Connect to the ShakerBot Setup Network
On your phone, tablet, or laptop, open your WiFi settings and connect to the network named ShakerBot-XXX (where XXX is a unique identifier for your device). Most devices will automatically redirect to the Home page. (If not, open a browser and go to 192.168.4.1).
Join Your Network
Enter your home or office WiFi name (SSID), password and time zone, then tap Save. ShakerBot+ will disconnect from its setup network, join your network, and sync the time via NTP. This takes about 20 seconds.
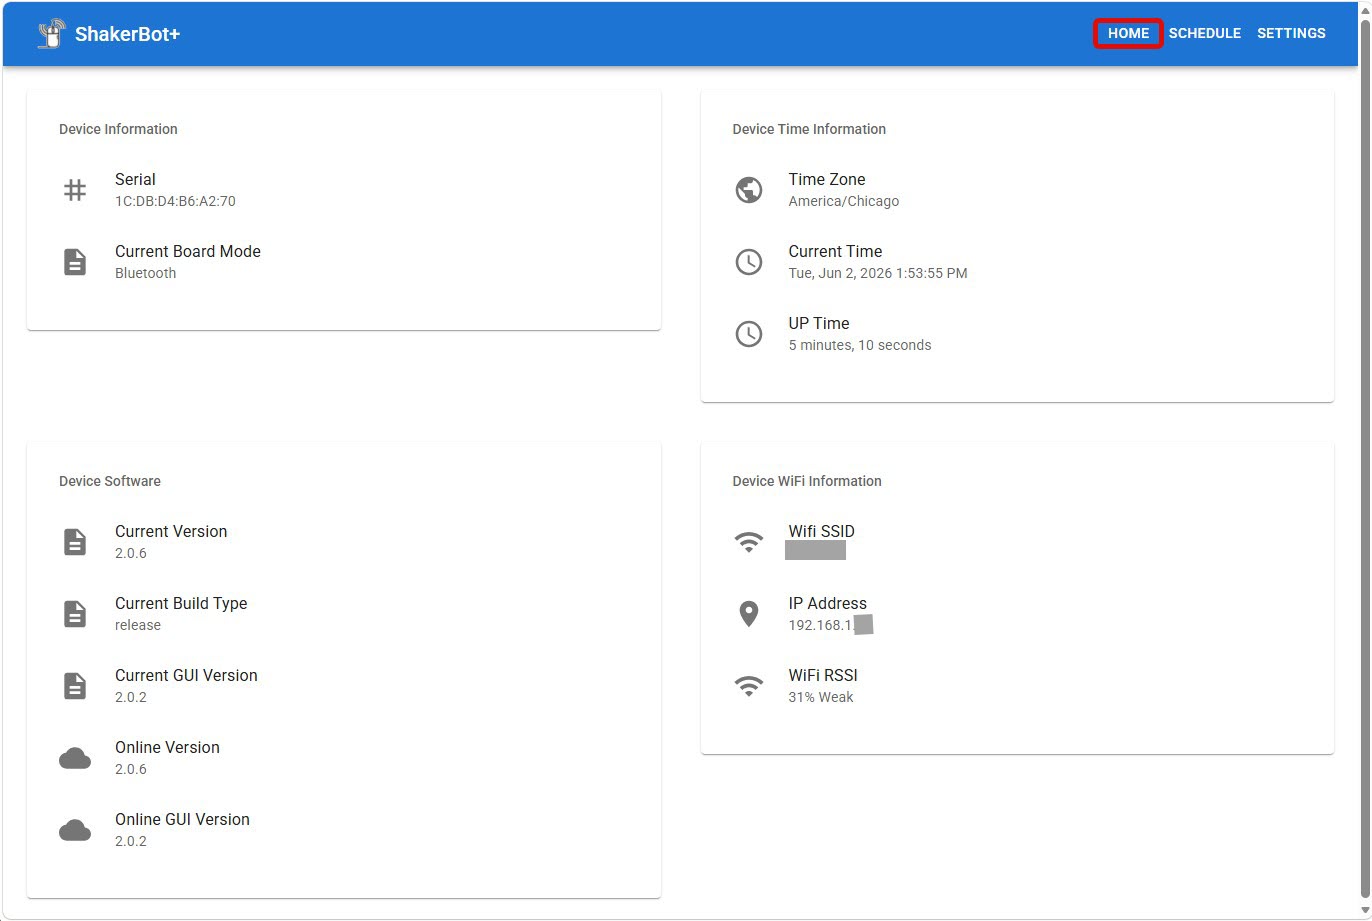
Configure Your Settings and Schedule at shakerbot.local
Once ShakerBot+ is on your network, open any browser on any device on the same WiFi and navigate to shakerbot.local (or actual IP address of your ShakerBot+). This is your personal configuration dashboard — accessible any time, even while ShakerBot+ is actively running.
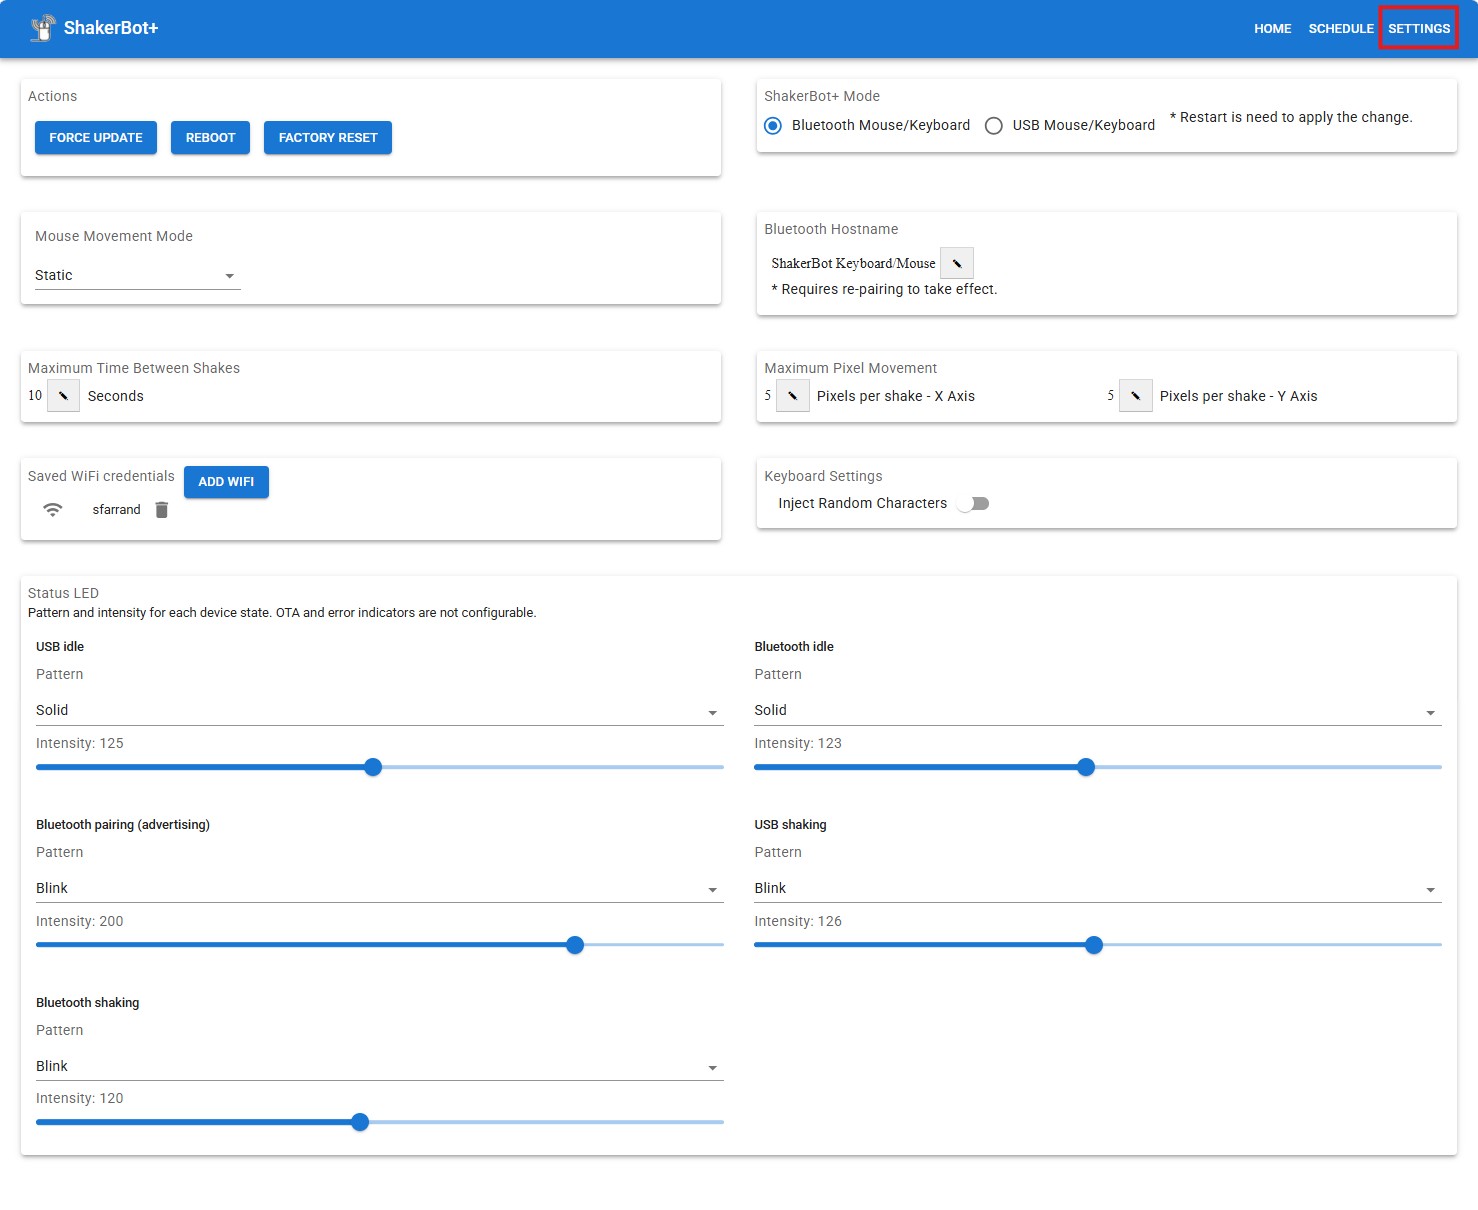
On the Settings tab, configure how ShakerBot+ connects and moves: choose USB or Bluetooth mouse/keyboard mode, select a mouse movement mode from the dropdown, and set the Bluetooth hostname when using wireless. The Actions panel also gives you Force Update, Reboot, and Factory Reset controls. Switching connection mode requires a restart; changing the Bluetooth hostname requires re-pairing.
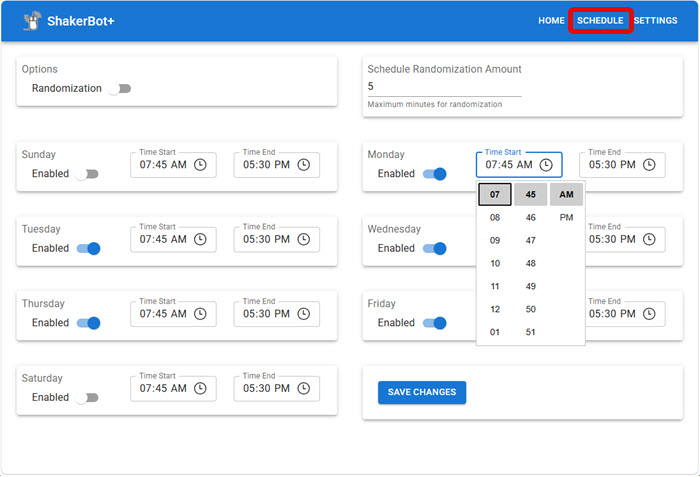
From the Schedule tab, set your start and stop times for each day of the week. Built-in randomization automatically extends activity slightly beyond your set times — so if you leave early on Friday, you stay covered a little longer.
When you’re happy with your settings, tap Save Changes. If you selected USB mode, ShakerBot+ is ready to go. If you selected Bluetooth, continue to Step 5.
Bluetooth Mode (Optional)
If you selected Bluetooth mode in Step 4, pair ShakerBot+ with your target device. It appears as ShakerBot+ Keyboard/Mouse in your Bluetooth device list. USB remains connected for power only.
Settings → Bluetooth & devices → Add device → Bluetooth → select ShakerBot+ Keyboard/Mouse.
System Settings → Bluetooth → select ShakerBot+ Keyboard/Mouse from the nearby devices list.
Open Bluetooth settings, tap ShakerBot+ Keyboard/Mouse in the available devices list and confirm pairing.
Settings → Bluetooth → select ShakerBot+ Keyboard/Mouse. No additional steps required.
OTA Firmware Updates
ShakerBot+ updates itself automatically over WiFi. When a new firmware version is available, the update installs in the background — no cables, no software, no manual steps. Your existing schedule and settings are preserved through every update.
You can check the current firmware version and trigger a manual update check from the About tab in shakerbot.local. OTA updates are included for the life of the device at no charge.
Troubleshooting
I can’t find the ShakerBot-XXX WiFi network
Make sure ShakerBot+ is powered (LEDs should be visible). If no LEDs are on, check the USB-C connection and try a different port or cable.
If ShakerBot+ was previously connected to a network, press and hold the Reset button for 3 seconds to clear stored credentials and restart in setup mode.
shakerbot.local doesn’t load in my browser
shakerbot.local is served by ShakerBot+ directly — your browser must be on the same WiFi network as the device. mDNS (.local addresses) requires both devices on the same subnet.
If .local addresses don’t work (common on VPN or corporate networks), find ShakerBot+’s IP address in your router’s device list and use that directly in the browser instead.
The device isn’t moving the mouse / sessions still time out
Check that the current time and day fall within your configured schedule window at shakerbot.local. If time looks wrong, ShakerBot+ may not have synced NTP yet — requires internet access on your WiFi.
Also confirm the USB data-line switch is in the enabled (non-stealth) position if using USB mode. In Bluetooth mode, ensure pairing is still active on the target device.
I need to connect ShakerBot+ to a different WiFi network
Press and hold the Reset button for 3 seconds. ShakerBot+ clears stored credentials and restarts in setup mode. Follow Steps 2–3 above to connect to the new network.
I need more help
Contact Ingenix Support — include your order number and a description of what’s happening. We typically respond within one business day.